So, you've invested in a Honda EU6500is, one of the most reliable and efficient generators on the market. Congratulations! Getting started with your new power companion should be a smooth process, but like any powerful piece of equipment, there are crucial steps and safety measures to understand before you can harness its full potential. This comprehensive guide will walk you through the essential Setup & First Use: Getting Started with Your Honda EU6500is, ensuring you're ready to tackle outages, power remote projects, or enhance your outdoor adventures with confidence.
We're going beyond just the instruction manual here. Think of this as your personal expert companion, helping you navigate every nuance from unboxing to your first successful power-up.
At a Glance: Your EU6500is First Use Checklist
- Safety First: Always review carbon monoxide, electrical, fire, and refueling warnings. Operate outdoors only!
- Unbox & Assemble: Install wheels, handle, and rear bar. The generator is shipped without oil and with the battery disconnected.
- Add Engine Oil: This is critical. Use recommended 4-stroke motor oil (SAE 10W-30) up to the filler neck.
- Connect Battery: Red to positive (+), black to negative (−). Check voltage (12.3V+).
- Fuel Up Safely: Use fresh, unleaded gasoline (86+ octane, max 10% ethanol). Refuel outdoors with engine off and cool.
- Pre-Flight Check: Disconnect appliances, set voltage, fuel valve ON, EcoThrottle OFF (for warm-up).
- First Start: Engine switch to START (max 5 seconds). Use recoil if the battery is low.
- Understand Controls: Get familiar with the i-Monitor, Voltage Selector, EcoThrottle, and safety indicators.
- Power On: Connect appliances within load limits, distributing power if needed.
- Shutdown Safely: Unplug, engine switch OFF, fuel valve OFF.
Before We Begin: The Absolute Must-Knows (Safety First!)
Before you even think about adding fuel or turning a switch, it's vital to grasp the non-negotiable safety principles that govern generator use. These aren't suggestions; they are directives designed to protect you and those around you from serious harm or even death. Your Honda EU6500is is a powerful tool, and respecting it starts with understanding its inherent risks.
The Honda EU6500is, like all internal combustion engines, produces exhaust containing carbon monoxide (CO), a colorless, odorless, and deadly gas. Furthermore, it handles flammable fuel and generates significant electrical current.
Here are the critical warnings you must commit to memory:
- The Silent Killer: Carbon Monoxide (CO) Poisoning. This is the number one hazard. NEVER run your generator indoors, in a garage, carport, or any enclosed or partially enclosed space. Always operate it outdoors, at least 3 feet (1 meter) away from buildings, with the exhaust pointed away from windows, doors, and vents. Even an open garage door isn't enough to prevent CO buildup. If you feel dizzy, nauseous, or have a headache, get to fresh air immediately and seek medical help.
- Electric Shock & Electrocution. Keep the generator dry. Operating in wet conditions or with wet hands is extremely dangerous. Do not connect your generator directly to a building's electrical system unless an isolation switch (transfer switch) has been properly installed by a qualified electrician. Failing to do so can send power back into the utility grid (backfeed), electrocuting utility workers or anyone who comes into contact with the lines, and damaging your generator.
- Fire & Burn Hazards. The exhaust system and muffler become extremely hot during operation and remain hot for some time after shutdown. Maintain at least 3 feet (1 meter) of clearance from buildings and combustible materials. Never enclose the generator or store flammable items nearby. Allow the engine to cool completely before moving or storing it indoors. Gasoline is highly flammable and explosive.
- Refueling Safety. Always refuel outdoors in a well-ventilated area with the engine OFF and cooled. Do not smoke or allow flames or sparks near the generator or fuel. Never overfill the fuel tank. Wipe up any spills immediately. Store gasoline in approved, clearly labeled containers, away from living areas and ignition sources.
This owner's manual is a permanent part of your generator and should remain with it if you ever sell it. Please familiarize yourself with its contents, as Honda reserves the right to change product specifications or design without notice.
Unboxing Your Powerhouse: What's in the Box (and What You'll Need)
Your Honda EU6500is is a robust piece of equipment, and it arrives partially disassembled to ensure safe transport. Getting it ready involves a few key steps that are essential for its proper function and safety. The generator is shipped WITHOUT ENGINE OIL and with the battery disconnected.
Before you begin, gather these essential tools:
- Two 14mm wrenches
- A 10mm wrench or Phillips head screwdriver
- Pliers
- Engine oil (API SJ or later, SAE 10W-30 recommended)
- Fresh unleaded gasoline
Step-by-Step Setup: From Box to Ready-to-Run
This is where your generator journey truly begins. Follow these steps carefully to ensure your EU6500is is properly assembled and ready for its first start.
1. Wheel Kit Installation: Giving Your Generator a Stance
The wheel kit isn't just for portability; it's mandatory for proper air intake and cooling. The generator's design requires this ground clearance.
- Position the generator so you can easily access the frame.
- Install two wheels onto the axle, then secure the axle assembly to the generator frame.
- Attach the two support stands (or "feet") to the opposite side of the generator frame.
- Ensure all bolts are tightened securely.
2. Attaching the Handle & Rear Bar
These components provide crucial leverage for moving your generator and offer protection.
- Align the handle assembly and the rear bar with their respective mounting points on the generator frame.
- Use the provided hardware to secure them firmly. The folding handle should move freely but lock into place when extended.
3. Connecting the Battery: Powering Up the Electric Start
Your EU6500is features an electric starter, powered by a 12V battery that is shipped disconnected for safety.
- Locate the battery compartment, usually behind a maintenance cover.
- Crucially, connect the red positive (+) cable to the positive (+) terminal on the battery FIRST.
- Then, connect the black negative (−) cable to the negative (−) terminal.
- Secure both connections firmly, ensuring they won't vibrate loose.
- Replace the battery maintenance cover.
4. Adding Engine Oil: The Lifeblood of Your Engine
This is perhaps the most critical step. Your generator is shipped DRY of engine oil. Running it without oil, even for a moment, will cause severe and irreversible engine damage.
- Place the generator on a firm, level surface.
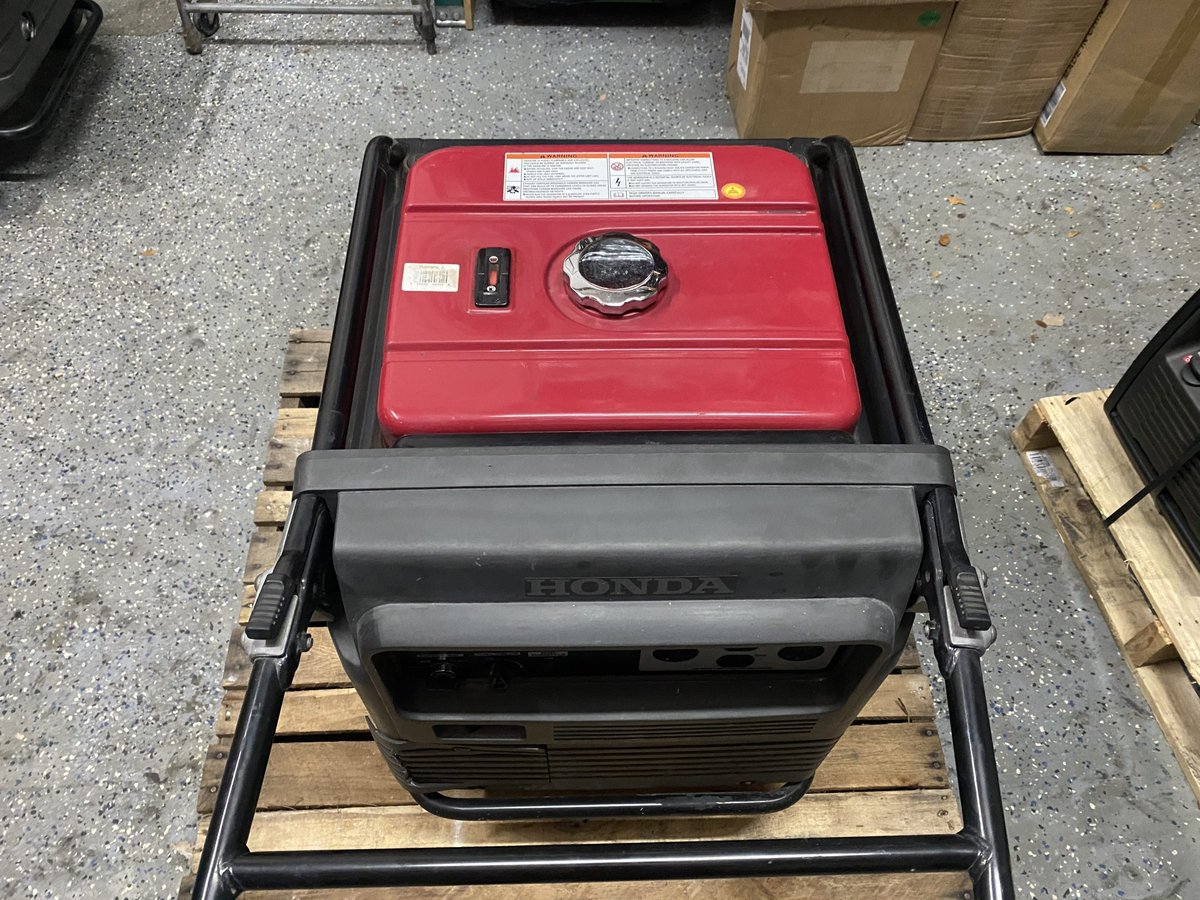
- Locate the oil filler cap (usually on the right side, behind a maintenance cover).
- Remove the filler cap.
- Carefully add the recommended 4-stroke motor oil (API SJ or later, SAE 10W-30) to the engine. Fill until the oil reaches the top of the oil filler neck. Do not overfill.
- Replace and tighten the oil filler cap.
5. Initial Battery Voltage Check
After connecting the battery, it's a good practice to ensure it has sufficient charge for the electric start.
- Your i-Monitor™ can display battery voltage. It should read 12.3 V or more.
- If the voltage is low, you might need to charge the battery using an external charger (a 1.1 amp charger for 5 hours is recommended for the 11.2 Ah battery) or rely on the recoil starter for your first few starts.
Getting to Know Your EU6500is: Controls and Indicators Explained
Before you fire up your generator, take a moment to familiarize yourself with its key controls and the information it provides. Understanding these will make operation much smoother and safer.
The Brain: Your i-Monitor™
This digital display is your window into the generator's performance and health. It shows:
- Total Operating Hours: Essential for tracking maintenance intervals.
- Approximate Generator Output (VA): Helps you monitor your load.
- Engine RPM: A quick look at how hard your engine is working.
- Battery Voltage (Volts DC): Crucial for knowing your electric start health. A "batt" message means low battery and you'll need the recoil starter.
- Error Messages: Like E-01 (remote start button pressed too long); persistent errors warrant a dealer visit.
Key Controls: Your Command Center
- Fuel Valve Lever: Simple but vital. ON to allow fuel flow to the engine, OFF to stop it (and for storage/transport).
- Engine Switch: Your master control.
- OFF (Key Removable): Shuts everything down.
- ON (for Recoil Starter): Powers the ignition system for manual starting.
- START (Electric Start): Engages the electric starter motor.
- REMOTE (Optional Control Kit): For use with the optional remote start/stop system.
- Recoil Starter: A backup for when the battery is low. Pull the grip briskly (within 20 degrees of horizontal) and return it gently.
- EcoThrottle™ System: This smart feature automatically adjusts engine speed to match the electrical load, reducing noise and improving fuel efficiency.
- Use ON: For light loads or when no power is being drawn.
- Use OFF: For high electrical loads, appliances with large startup demands (like refrigerators or power tools), or sensitive electronics that require consistent RPM and minimal voltage fluctuation. Always turn OFF for warm-up.
Power Selection: The Voltage Selector Switch
This switch is critical for setting your generator's output.
- 120V ONLY: Restricts output to only the 120V receptacles. The 120/240V receptacle MUST NOT be used in this setting.
- 120/240V: Allows simultaneous use of both 120V and 240V receptacles. This is generally the setting for heavier loads or when you need both voltage types.
- Important: Set this switch before starting the engine.
Safety Indicators & Protectors
- Output Indicator (Green): Illuminates when the generator is running normally and producing power.
- Overload Indicator (Red): Lights up if you've overloaded the generator, have a short circuit, or if the inverter overheats. If it stays on for about 5 seconds, power output will shut down, and the green output indicator will go off.
- Oil Alert Indicator: If the oil level drops too low, this indicator lights up, and the engine automatically stops to prevent damage. You'll also see "OIL" on the i-Monitor.
- AC Circuit Protectors: These are your automatic circuit breakers. They'll trip (pop out) if there's a short circuit or an overload. If one trips, reduce your load or fix the short before resetting it by pushing it back in.
Ground Terminal
This connects the generator frame and receptacle ground terminals. For specific grounding requirements, especially when connecting to a structure, consult a qualified electrician and local electrical codes.
Fueling Up Safely: Powering Your Generator
With assembly complete and controls understood, it's time for fuel. Remember, gasoline is highly flammable, so utmost caution is required.
- Fuel Type: Use fresh, regular unleaded gasoline with an octane rating of 86 or higher. The maximum allowable ethanol content is 10% (E10), and for methanol, it's 5%. Avoid stale or contaminated fuel, or any gasoline/oil mixtures.
- Location: Always refuel outdoors in a well-ventilated area.
- Engine Condition: Ensure the engine is OFF and has had ample time to cool down.
- No Ignition Sources: Keep flames, sparks, and smoking materials far away from the refueling area.
- Filling: Do not overfill the tank. Leave some air space for expansion.
- Spills: Wipe up any gasoline spills immediately with a clean cloth. Dispose of the cloth safely.
Once fueled, ensure the fuel cap is securely tightened.
Your First Start: Firing Up the EU6500is
You're almost there! Before that satisfying roar, a quick final check.
Pre-Operation Checklist (Before Every Start):
- Level Surface: Ensure the generator is on a firm, level surface.
- Engine Switch OFF: Confirm the engine switch is in the OFF position.
- Check Oil: Verify the engine oil level is at the top of the filler neck.
- Check Fuel: Confirm sufficient fuel in the tank.
- Air Filter: Ensure the air filter is clean and properly installed.
- Battery Cover: Make sure the battery maintenance cover is securely in place.
- Disconnect Appliances: Crucially, unplug ALL appliances from the generator before starting. This prevents sudden load on the engine and potential damage to your devices.
Starting Procedure (Electric Start):
- Voltage Selector: Set the Voltage Selector Switch to your desired output (e.g., "120/240V"). Remember, if you select "120V ONLY," do not use the 120/240V receptacle.
- Fuel Valve ON: Turn the fuel valve lever to the ON position.
- EcoThrottle OFF: For the first start and warm-up, set the EcoThrottle system to OFF. This ensures the engine runs at a consistent, higher RPM for optimal starting and stabilization. You can engage EcoThrottle ON once warmed up and under light load.
- Engine Switch to START: Turn the engine switch to the START position. Hold for a maximum of 5 seconds. As soon as the engine starts, release the switch, and it will return to the ON position.
- Warm-Up: Allow the generator to run for a few minutes to warm up before connecting any loads. The green output indicator should illuminate, confirming power generation.
Using the Recoil Starter (If Battery is Low):
If your battery is low ("batt" message on i-Monitor) or you prefer manual starting:
- Perform steps 1-3 from the electric start procedure above.
- Turn the engine switch to ON.
- Open the right maintenance cover (for access to the recoil starter).
- Grip the recoil starter handle and pull it briskly and smoothly. Do not pull it more than about 20 degrees from horizontal. Let the rope retract gently. Repeat until the engine starts.
- Once started, close the maintenance cover.
Remote Start (Optional Kit):
If you have the optional remote control kit:
- Perform steps 1-3 from the electric start procedure.
- Turn the engine switch to REMOTE.
- Press and hold the start button on your remote control for a maximum of 5 seconds.
Plugging In: Connecting Your Appliances
Once your EU6500is is humming along and the green output indicator is lit, you're ready to connect your electrical loads.
- Appliance Check: Ensure all appliances are in good working order and their electrical ratings do not exceed the generator's capacity.
- Load Capacity: Your EU6500is offers a maximum power of 6,500 VA (for up to 30 minutes) and a rated continuous power of 5,500 VA. Be mindful of these limits. Overloading will trip the AC circuit protectors and may damage your generator or appliances.
- Distribute Your Loads: The EU6500is has multiple receptacles connected to two main power circuits. To prevent overloading, it's wise to distribute your load:
- Circuit I: Receptacles 1, 3, and 4 (check your manual for exact numbering).
- Circuit II: Receptacles 2 and 5 (check your manual).
- The total rated current for both circuits combined is 45.8 Amps. Avoid plugging all high-demand appliances into a single circuit.
- Connect Appliances: Plug in your devices one by one, starting with the highest current draw. Monitor the i-Monitor's output display to stay within limits.
Connecting to Your Home: The Crucial Isolation Switch Warning
This bears repeating: NEVER connect the generator directly to your home's electrical system by plugging it into a wall outlet. This is known as "backfeeding" and is incredibly dangerous. It can cause electrocution to utility workers or damage to your home's wiring.
- Professional Installation Required: If you intend to power your home's electrical system during an outage, you must have an isolation switch (also called a manual transfer switch) installed by a qualified, licensed electrician. This switch safely isolates your home's electrical system from the utility grid before connecting generator power.
- Grounding: Your Honda generator has a system ground (frame connected to receptacle ground terminals). However, it is not connected to the AC neutral wire, which means common receptacle testers might show different ground conditions than what you'd see in a typical home outlet. This is normal for a portable generator but reinforces the need for professional installation when connecting to a building. For deeper insights into managing your power needs, including generator sizing and types, consult Your Honda 6500 generator guide.
Turning It Off: A Gentle Shutdown
Proper shutdown is just as important as proper startup for the longevity of your generator.
Normal Shutdown:
- Unplug Appliances: Disconnect all electrical loads from the generator.
- Engine Switch OFF: Turn the engine switch to the OFF position.
- Fuel Valve OFF: Turn the fuel valve lever to the OFF position. This helps to run the carburetor dry, preventing stale fuel issues during storage.
Emergency Shutdown:
- Engine Switch OFF: In an emergency, simply turn the engine switch to the OFF position.
Remote Stop (Optional Kit):
- Press the stop button on your remote control.
- Follow steps 2 & 3 from the normal shutdown process (Engine Switch OFF, Fuel Valve OFF).
Beyond the First Run: Early Maintenance Tips
While this guide focuses on setup and first use, a few early maintenance habits will ensure your EU6500is remains a reliable power source.
- Check Engine Oil Regularly: Especially after the first few hours of operation, and before each subsequent use. Change the oil while the engine is warm for complete drainage.
- Air Cleaner: In dusty environments, inspect and clean the foam air filter frequently. Running without a filter or with a dirty one can lead to rapid engine wear.
- Battery Maintenance: If your generator isn't in constant use, recharge the battery monthly to prevent it from discharging completely. A small 1.1-amp charger can keep it topped up.
Common First-Time Headaches & Quick Fixes
Even with the best intentions, you might encounter a snag or two during your initial experience. Here are some common issues and their immediate solutions:
- Engine Will Not Start:
- Fuel Valve: Is it ON?
- Engine Switch: Is it ON (for recoil) or START (for electric)?
- Fuel Level/Quality: Is there enough fresh fuel?
- Oil Alert: Is the oil level sufficient? If the "OIL" indicator is on, add oil.
- Spark Plug: Is it clean, properly gapped (0.028 – 0.031 in / 0.70 – 0.80 mm), and connected?
- Flooded Engine: If you've tried starting too many times, the engine might be flooded. Wait a few minutes, then try again without choke (if applicable, though the EU6500is is typically auto-choke).
- Engine Lacks Power:
- Air Filter: Is it dirty and restricting airflow? Clean or replace it.
- Fuel Quality: Is the fuel stale or contaminated? Drain and refill with fresh fuel.
- No Power at Receptacles:
- AC Load: Is the generator overloaded? Reduce the load.
- Overload Indicator: Is the red overload light on? It means the circuit protector likely tripped. Reset after reducing load.
- Circuit Protectors: Have any tripped (popped out)? Push them back in.
- Appliance: Is the connected appliance working correctly?
- Restart: Try stopping and restarting the engine.
- Voltage Selector: Is it set correctly?
For persistent issues, especially those related to error codes on the i-Monitor, consult your Honda servicing dealer.
Making It Last: Transport & Storage Basics
While not strictly "first use," knowing how to handle your generator after its initial run is crucial for its longevity.
- Cool Down: Always allow the engine to cool for at least 15 minutes before transporting or moving it into storage.
- Keep Level: Transport the generator on a level surface.
- Fuel Valve OFF: Turn the fuel valve to OFF to prevent fuel leaks.
- Tie-Down: Use the sturdy frame bars as tie-down points when securing the generator for transport.
- Storage: Store in a well-ventilated area away from flames or sparks. If storing with fuel, use a fuel stabilizer. For long-term storage, it's best to drain the fuel system and change the engine oil. Always cover the generator only when the engine and exhaust system are completely cool, using a breathable cover.
Expert Insights: High Altitude & Emissions
For specific operating conditions, a bit of specialized knowledge can go a long way.
- High Altitude Operation: If you plan to operate your EU6500is above 5,000 feet (1,500 meters), a carburetor modification is recommended. This adjustment, performed by a Honda servicing dealer, prevents performance issues and ensures emission compliance. Without it, engine horsepower decreases by about 3.5% for every 1,000-foot (300-meter) increase in altitude. Be aware that a high-altitude modified generator will run too lean at lower altitudes, potentially causing damage, so it must be returned to factory specifications if you return below 5,000 feet.
- Emission Control System: Your Honda engine is designed to meet EPA and California regulations. Tampering with the emission control system is illegal and can lead to issues like hard starting, rough idle, black smoke, or high fuel consumption. Always use genuine Honda parts for emission-related maintenance.
Your Honda EU6500is Journey Begins Now
You've successfully navigated the critical steps of setting up and performing the first use of your Honda EU6500is. With a clear understanding of its components, safety protocols, and operational procedures, you're now equipped to responsibly and effectively use this powerful generator.
Remember, patience and adherence to the guidelines, especially safety warnings, are your best allies. Your EU6500is is built to provide years of reliable service, and a proper start sets the foundation for that longevity. Enjoy the peace of mind that comes with dependable power, expertly handled.